autocad blocks: The Right Way to Do It
Learn how to use and create AutoCAD blocks to speed up your engineering workflow and ensure high-precision drawings. A practical, step-by-step guide for CAD professionals.
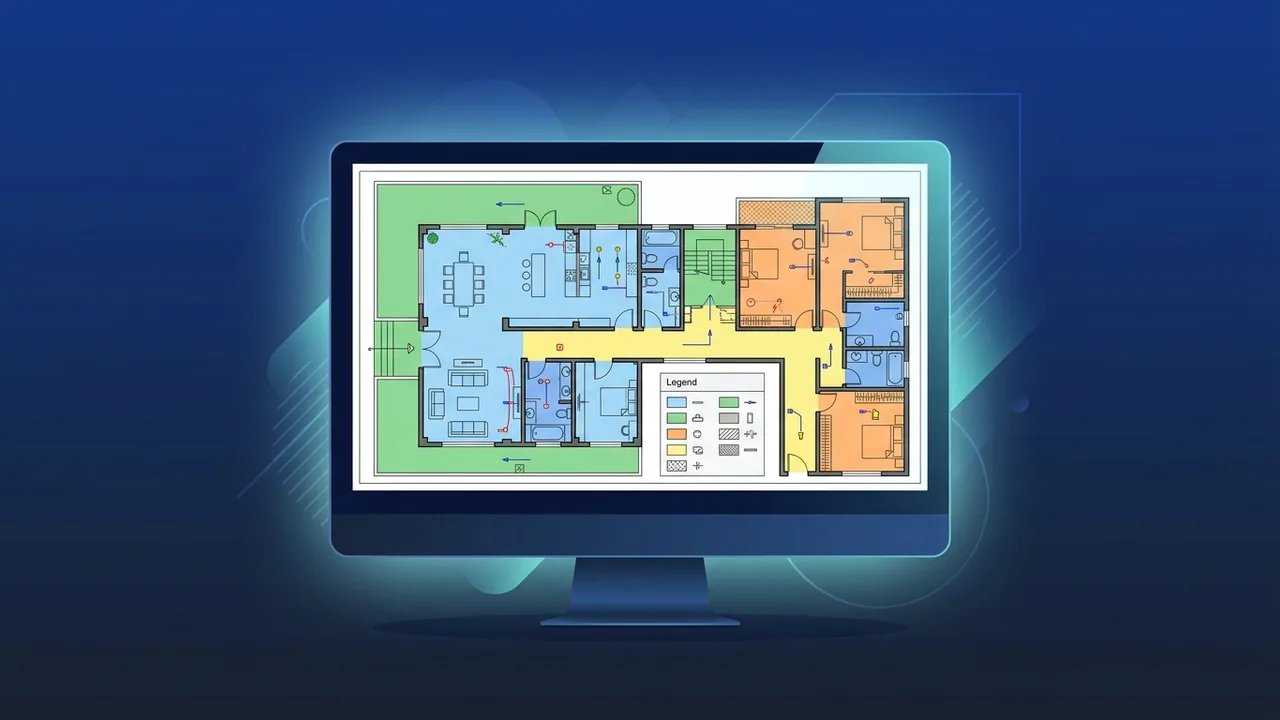
Overview of autocad blocks
Using autocad blocks is widely considered one of the most vital technical practices for architects, structural engineers, and interior designers in Saudi Arabia and worldwide. In the fast-moving Saudi engineering and construction sectors, efficiency and productivity are crucial to delivering massive infrastructure and residential projects on schedule. During the layout phase, professionals routinely deal with thousands of repeating components, such as doors, structural columns, furniture layouts, or specialized electrical and plumbing symbols. Manually drafting these components every single time is highly counterproductive. This feature solves this challenge by enabling you to group multiple geometric objects (including lines, arcs, and polylines) into a single, cohesive entity with a unique name that can be easily reused.
Understanding the core mechanics of autocad blocks and implementing them correctly in your design pipeline is not just an added skill—it is an absolute necessity for professional standard management. When drafting a massive residential complex or commercial center layout in cities like Riyadh, Jeddah, or Dammam, you can insert hundreds of standardized elements instantly. Instead of redrawing everything from scratch, which leaves significant room for manual discrepancies, this tool ensures every single duplicated element is completely identical down to the millimeter. This standardized approach guarantees absolute accuracy, which is essential when these drawings move from the digital workspace onto the active construction site.
Furthermore, this methodology plays a critical role in system performance and computer resource allocation. When a CAD drawing file contains thousands of loose, independent shapes, the system must process and display every single coordinate and property individually, which often results in severe software lagging, freezing, or crashing during heavy rendering or exporting phases. By organizing these shapes into blocks, the drawing file saves only one geometric definition in its internal database. Every other copy you insert is treated as a lightweight visual reference pointing back to that main definition, ensuring your design workspace remains fast, responsive, and easy to navigate.
Key Features
The technical advantages of using autocad blocks are vast and impact every phase of project execution. Here are the most prominent features that make this tool indispensable for professional drafting:
- Optimized File Sizes: Large-scale CAD drawings are prone to becoming bloated and difficult to share via email or cloud platforms. Converting repeating components into blocks can reduce the final DWG file size by up to 70% in some complex masterplans, making collaboration smooth and hassle-free.
- Global and Automatic Updating: Imagine you have placed hundreds of light fixtures across a commercial office layout, and the client suddenly requests a change in the fixture model. Instead of deleting and re-inserting every fixture individually, you simply open the block editor, update the geometry once, and watch every instance across your layout update instantly and automatically.
- Standardization and Quality Control: This feature allows design firms to create customized, standardized symbol libraries. By using pre-approved blocks, everyone on the design team uses identical symbols, layer settings, and dimensions, presenting a highly cohesive and professional set of drawings to clients and local regulatory authorities.
- Dynamic Functionality: Dynamic blocks are a highly advanced evolution of the tool. They allow you to apply smart parameters and actions directly to your drawings. A single dynamic block can be scaled, stretched, rotated, or mirrored interactively. For instance, instead of saving six separate door blocks for different sizes, you can have a single dynamic door block with built-in size presets.
- Attribute Integration: You can attach non-graphical text attributes to your blocks, such as model numbers, manufacturers, costs, or fire ratings. This structured data can then be extracted automatically to generate highly accurate schedules and bills of quantities (BOQ), streamlining procurement and budgeting processes in the Saudi market.
How to Use
To implement autocad blocks correctly and unlock their full potential in your daily workflow, follow this practical, step-by-step technical guide:
Step 1: Creating Your Block (Block Definition)
Draw the desired shape or symbol precisely using standard CAD drafting tools. Once the graphics are fully completed, type the command BLOCK (or the shortcut B) in the command line and press Enter. A setup window will appear, requiring you to configure three vital parameters:
- Name: Choose a descriptive, standardized name that accurately represents the element for quick identification in your catalog.
- Base Point: Click "Pick Point" to set a precise snap coordinate on the object (like a corner or center point). This serves as the main handle you will use to grab and rotate the block when inserting it.
- Objects: Click "Select Objects" and select all the individual lines, arcs, and shapes that make up the graphic, then choose "Convert to Block" to complete the setup.
Step 2: Configuring Layers and Colors Properly
One of the most common mistakes beginners make is creating block components on arbitrary layers. The professional way to do this is to draw all the internal geometry on the default Layer 0 and set the colors, line types, and line weights to "ByLayer". This setup ensures that when the block is placed on a specific design layer later, it automatically takes on the color and property characteristics of that layer, giving you total visual control.
Step 3: Inserting Your Block
Whenever you need to place a block into your active layout, enter the command INSERT (or its shortcut I). This command launches an advanced, user-friendly palette showing all defined blocks in the drawing. You can also browse external project files to import custom blocks. Simply drag the desired item from the list and drop it onto your canvas, or specify exact coordinate, scale, and rotation values in the settings panel before placing it.
Step 4: Editing and Updating the Layout
If you need to make design modifications, simply double-click any active block in your workspace. This opens the isolated "Block Editor" interface. Perform all required visual or geometric adjustments, click "Save Block", and close the editor. All matching blocks throughout your entire project workspace will instantly reflect the changes.
Common Questions
Managing complex files with numerous repetitive assets can lead to technical challenges. Below are detailed answers to the most common questions CAD users face in the professional field:
What is the difference between internal and external blocks?
Internal blocks are stored and editable only within the specific drawing file in which they were created. External blocks, created using the WBLOCK (Write Block) command, are exported and saved as completely separate, individual DWG files on your local drive, making them easily accessible for completely new drafting projects.
Why do my block elements refuse to change colors when moved to a new layer?
This occurs when the internal lines of the block were originally drawn on a custom layer instead of Layer 0, or had specific individual colors assigned instead of "ByLayer". To resolve this, open the block in the editor, select all internal objects, set their layer properties to "0", and change their color setting to "ByLayer", then save your changes.
How can I disassemble a block back into its original geometric shapes?
If you need to edit a single instance of a block without affecting any of the other copies, you can use the EXPLODE command (shortcut X). Select the specific block instance, enter the command, and press Enter. This will instantly break the block back down into independent lines and arcs, although you will lose block functionality for that specific copy.
How does the Design Center tool assist in managing blocks?
The Design Center (accessible via Ctrl + 2 or typing ADCENTER) is a powerful navigation tool that allows you to browse the contents of closed drawing files on your computer. It lets you view, drag, and drop blocks directly from archived files into your active workspace without having to manually open those heavy files, saving a massive amount of time.
Important Tips
To maintain clean, error-free drawings and coordinate seamlessly with other engineering teams, make sure to apply these expert tips:
- Maintain Strict Unit Consistency: Before inserting any block, double-check that the drawing units (such as meters, centimeters, or millimeters) match perfectly between the block file and your target project file to prevent scale distortion issues.
- Position Your Base Points Logically: Never set your base point at a random empty location. Always align it with a highly useful geometric snap point (like the corner of a wall or the center of a column) to ensure effortless snapping and accurate positioning.
- Run the Purge Command Regularly: Unused block definitions remain stored in your file's background, increasing file size. Use the
PURGEcommand regularly to wipe out unused blocks, empty layers, and redundant styles, keeping your drawings lightweight and running fast. - Implement a Strict Naming Convention: Avoid using generic names like "Block1" or "Temp". Establish a logical, clear naming system such as
arch_door_90cmorelec_light_recessed, making it simple for you and your teammates to search, identify, and manage your libraries.
Conclusion
Using blocks correctly is an absolute game-changer for any CAD professional seeking to elevate their design speed, accuracy, and overall drafting productivity. By organizing your workspace with clean, reusable components, you can effortlessly manage the most complex technical drawings while maintaining professional presentation standards.
If you need a genuine Autocad 2025 windows lifetime license, you'll find it at ABMKeys at a fair price with instant WhatsApp delivery.
Frequently Asked Questions
What is the difference between internal and external AutoCAD blocks?
Why do block colors not change when placed on a new layer?
How do I explode a block back into individual elements?
How do blocks help in reducing AutoCAD drawing file sizes?
You can get a genuine license from ABMKeys at a competitive price with instant WhatsApp delivery.
Buy Now